Adding custom level tutorial
Author: Ladyofpayne
- 3ds max (gmax) no older than 2011 year - Eshme Import/Export DAO Tools doesn't work with new versions.
- Eshme Import/Export DAO Tools - Script for 3s max
- Dragon Age Origins and Dragon Age Toolset - install it in the same folder as the game.
- Adobe Photoshop and Nvidia DDS Plugin for textures.
- mesh lightmap fixes - Install this project.
- Engine won't work with models bigger than 45 000 polygons and 30 000 vertexes. Even if it works still make sure your model isn't too complex - Lightmapping render can be failed.
Before we begin extract all DAO resources and keep it somewhere. You will need them.
You can use also the toolset to extract the model and textures, but fisrt you need to know the name of what you are looking for, in the tooset go File->Open file-> /packages/core/data/modelmeshdata.erf there you have some strings to help you find the models:
armours: arm_ +armour type; gloves: glv_; boots: boo_; clothes: cth_; robes: rob_; helmets:hlh_; weapons: w_+ weapon type; shield:w_shd; hair: har_; props:prp_;placeabes:plc_; creature: c_; npc creatures: cn_; children: kn_;
for races and genders you have human/elf/dwarf/qunari followed by the gender female/male, so human male: hm_; dwarf female: df_; etc.
- in the modelmeshdata.erf you need extract the .msh files the _0 files are the model you see in game when using the armour/cloth, the _2 and _3 files are the low level of detail (LOD) models, when other NPCs are using them and they are far away from you.
- in the .../core/data/modelmeshhierarchy.erf you need extract the .mmh and .phy files.
- in the .../core/data/materialobjects.erf you need to extract the .mao file.
- in the files .../core/data/textures.erf (props, placeables) and/or .../core/textures/high/textures.erf (characters and armours) you need to extract the .dds files, in those files the letter for the races in the file's name are changed to p, so human male, dwarf male, elf male, qunari male are all: pm_, because they all use the same texture.
Contents
Script Settings
Watch where you install Eshme script - program files(x86) for 32 programs at 64 bit computers. Eshme script and the game have to be in one folder of program files.
Take Eshme Import/Export: Startup, YAGG and DAOTools -> put into C(ypur disc):/Program Files/Autodesk/3dsmax/Scripts -> scripts
If your installation is correct them when you first open 3d man you will see window with the settings
In Game Path HAVE to be folder of the game C:\Program Files (x86)\Dragon Age, in Export Path folder Override in folders C:\Program Files (x86)\Dragon Age\packages\core\override.
You need to install Dragon Age Toolset and then you can begin your work in 3 d Max -> Run Script.
Textures
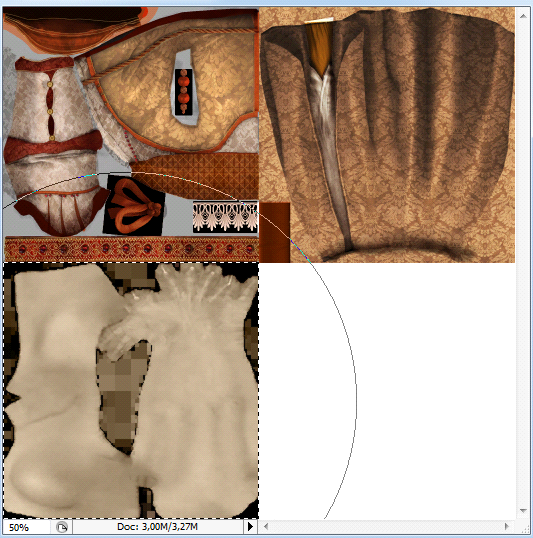
Size of the texture have to be :4 1024 -> 2048 -> 4096 -> 8192. You will need 3 type of them and you probably need to connect textures because DAO engine works only with one material at one model. Put them all in one file and make the same posistion for each part of every type:
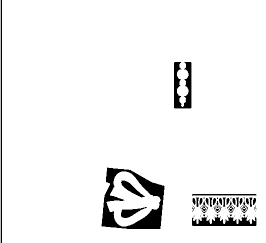
1) Diffuse map. Has "_d" letter in the name. What your model will looks like. Create Alpha channel and make it white inless you have parts than need to have "holes" in it. Then it will looks like that:
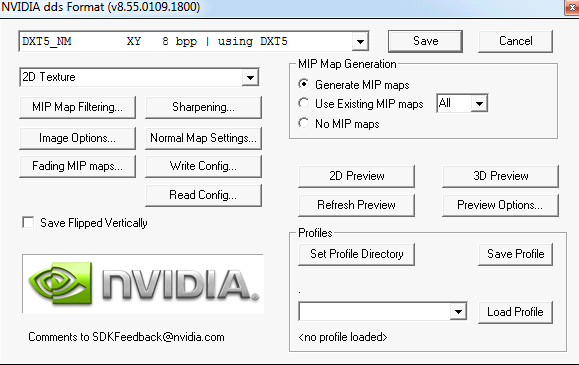
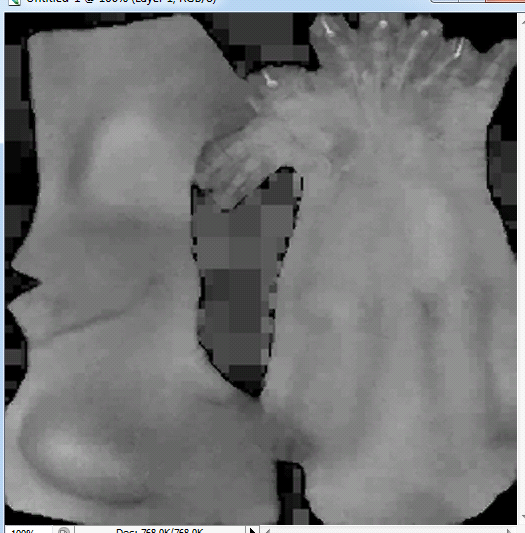
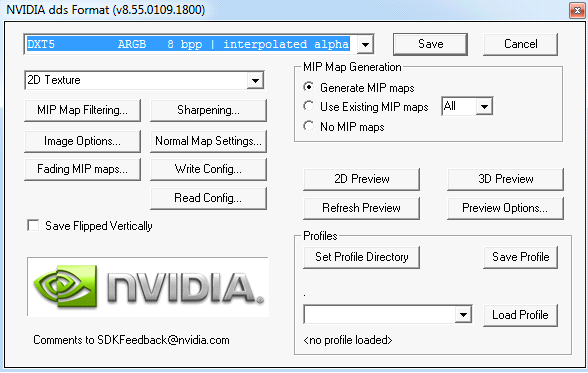
2) Normal map. Has "_n" letter in the name. It is grey texture. Just save your Diffuse map with this settings:
How it has to looks like:
3) Spectacular map. Has "_s" letter in the name. Simply make it all black and alpha channel to make it look like Diffuse map and without glissen.
Save you textures. Normal map settings is listed above. Diffuse and Spectacular settings:
4) All textures put into C:\Users\User\Documents\BioWare\Dragon Age\AddIns\your module ID\core\data\your_folder. Each model has to be organised and be in it's own folder. Make sure each model has all 3 types of textures and each type has it's letter. Example: prp_namemodel_0d, prp_namemodel_0n, prp_namemodel_0s.
3d Max
Article in development. Please don't delete it.
More than one texture
Even if youe model has oone texture it is better to make sure evertything is correct.
1- Open Modifiers-> UV Corrdinates- > Unwrap UVW
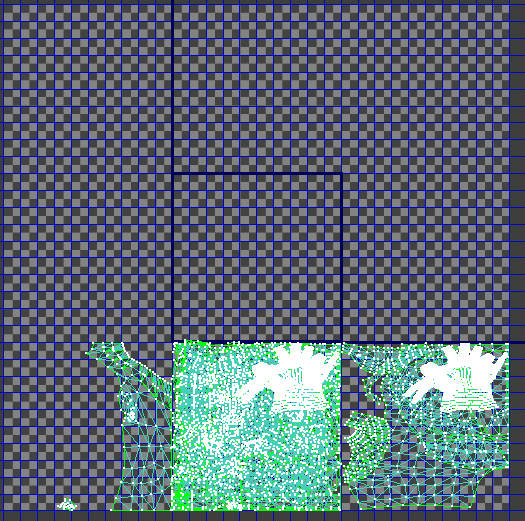
Важное отступление - если ваша модель полностью покрывается одной текстурой, то ничего из нижеописанного вам проделывать не нужно. Сейчас нам нужно объединить несколько материалов в один. Процесс не тривиальный. Итак, когда вы откроете редактор координат, то увидите вот такую картину:
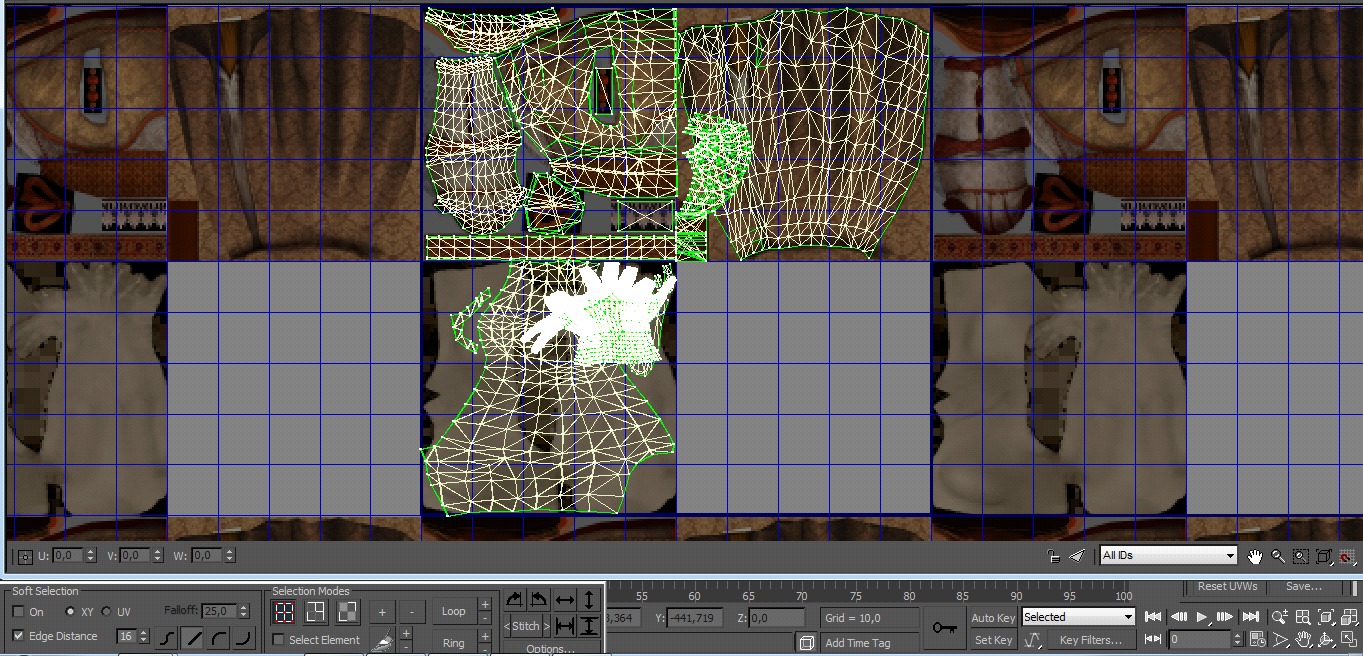
Зеленые линии - это координаты модели на текстуре. Многие игровые движки используют все пространство редактора, но не ДАО. Наша игра не видит ничего за границами выделенного квадрата. Наша задача - передвинуть все координаты во внутрь этого квадрата. Во вкладке All ID's можно выбирать отдельные материалы и двигать их. Наложите текстуру, которую вы создали в фотошопе и согласно ее контурам отмасштабируте и перенесите ее на соответствующее место. Тоже самое нужно бьудет проделать и со всеми сетами материалов, чтобы в конце-концов получилось что-то вроде этого:
После этого можно закрывать редактор координат.
Models that work correct
You can test the collision by pressing button "Fade cutaway" and see which models disappear - those don't have collision. You can change it by set Override Cutaway: false if you use model without collision. Now press "Fade cutaway" - the model will be in level now. You don't have collision to cover your whole model- you need it cover only part on the ground so your character won't walk through the model.
Level
- "wallfull1_0" - Both. Wall with collision. Use it when you need wall.
- "wallfulldoor1_0" - Both. Door arch with collision. Use it when you need an arch without door.
- "support1_0" - Both. Two columns with collision. Use it when you need column- collision is cylindric form.
- tti_top01_01 - TTI ONLY.Celing without collision. Use it when you need an item on the ceiling without collision.
Props
- prp_painting_01_0 - painting on a wall with collision.
- prp_chestornat01_0 - chest with collision.
- prp_chair_01_0 - chair with collision.
- prp_table_01_0 - table with collision.
- prp_tevbookshelf1_0 - bookshelf with collision.
- prp_vase_01_0 - vase with collision.
- prp_bed01_0 - bed with collision.
- prp_statandraste_0 - statue andraste with collision.
- prp_cand04_0 - chandelier from above no collision.
- prp_dwfrug2_0 - rug on the floor.
- fca_floor01_0 - floor with collision.
Export
After your model will be exported put .MET files in C:\Users\User\Documents\BioWare\Dragon Age\AddIns\your module ID\core\data_tools
THE REST files have to be in folder in C:\Users\User\Documents\BioWare\Dragon Age\AddIns\your module ID\core\data. Each model has to be organised and be in it's own folder.
Lightmapping
Always leave colour intensity at 1. This number looks perfect in game.
If Render Lightmap fails you can find a model, that cause trouble, by isolating it. Change in Object inspector-> Lightmapping-> False. This can happen if your model too complex or too big. Don't make more than 3 character lights- there will be problems. Light Probe is final part in lightning your room. If you deside to change something in any of previous lights you have to create new light probe.
1. Ambient light. This ambient light will light the level but not the characters.
Right-click on "New Room" in top-left list > Insert > New Light anywhere in the room. Raise it up off the floor a little (e.g. Z = 2). In Object Inspector > "Light Type" Ambient - Baked > Colour 1,1,0.86
2. Character lights. You need them to light your characters. Copy and paste previous light or make a new one.
In Object Inspector > "Light Type" Point - Static > Affects Characters TRUE > Affects Level FALSE > Colour 0.70,0.70,0.65 > Point Radius 10000. Copy and paste until you have 3 static character lights and arrange them in a circle outside all of the rooms to make the characters be lighted from each side.
3. OPTIONAL:Additional lights. Add static or animated lights for tourches, fireplaces where necessary or wanted. EXAMPLE: Fireplace. Choose model fxe_fire_med_p and change it's scale (Object inspector) to 0.6.
4. EXTERIOR ONLY: Skip this step if it is interior. Select the Terrain in the Resource Tree and Add sunlight by using Button above with big +. Change fields with unique Layout name (export name) and Name (name of the location) -> click on Define Area drag (Left click -> drag) green square untill it covers all your area - this defines walkable space -> click on Set Sunlight and drag mouse until light will be as you wish.
5. Light Probe. "New Room" in top-left list > Insert > New Light Probe. Position doesn't matter at all. For location itself ONE lightproble is needed.NOTE: Each water mesh must have its own light probe 1 meter above.
6. Make sure you make your area Selected and click on button "Render Lightmap".
Delete all the lightmap files
My Documents\\\\BioWare\\\\Dragon Age\\\\Toolset\\\\LvlWorkspace\\\\lightmaps\\\\LAYOUT
My Documents\\\\BioWare\\\\Dragon Age\\\\Toolset\\\\ProbeLightMaps\\\\LAYOUT
My Documents\\\\BioWare\\\\Dragon Age\\\\Toolset\\\\resourcepostintermediatewin32\\\\processed\\\\addins\\\\MODULE\\\\layouts\\\\win32\\\\layouts\\\\LAYOUT
My Documents\\\\BioWare\\\\Dragon Age\\\\Toolset\\\\resourcepostintermediatewin32\\\\processed\\\\addins\\\\MODULE\\\\layouts\\\\win32\\\\modelhierarchies\\\\LAYOUT
My Documents\\\\BioWare\\\\Dragon Age\\\\Toolset\\\\resourcepostintermediatewin32\\\\processed\\\\addins\\\\MODULE\\\\layouts\\\\win32\\\\textures\\\\dds\\\\LAYOUT
(path of your level file)\\\\LAYOUT.erf
(path of your level file)\\\\LAYOUT.bak.erf
C:\\\\DOCUME~1\\\\Mike\\\\LOCALS~1\\\\Temp\\\\DALightmap\\\\LAYOUT (you can use Run... and type %TEMP% and hit OK)
(if you have posted to local) My Documents\\\\BioWare\\\\Dragon Age\\\\addins\\\\MODULE\\\\core\\\\override\\\\toolsetexport\\\\LAYOUT
Export
1. Save your .LVL files in C:\Users\User\Documents\BioWare\Dragon Age\AddIns\your Module_ID\core\env. Make sure .ERF and .ERF.BACK are here too after you press "Do All Local post".
2. Add minimap. Right click, then select Minimap > Minimap Selection Tool. The default green box appears. Right click on the area again, Minimap > Post Minimap to Local. It's possible to handcraft or refine the minimap, as detailed under Custom minimaps.
3. Press Button "Render lightmaps".
4. Press button "Set Start point" for Pathfinding -> Press button "Generate pathfinding". NOTE: Pathfinding is not possible for two overlapping height levels. Also generation fails if you put the start point in collision (non-walkable part) so watch carefully where do you put it.
5. Press button "Do All Local post" - this will export your level and you can use it in your area.
Useful links
- Installing the toolset - very important for program troubleshooting. NVIDIA_PhysX section- if you have pathfinding generation problems.
- Bug: Water plane missing in-game - how to fix this bug and make your wateer appear in the game.
- Lighting Tutorial - Lightmapping troubleshooting.
- Level Editor Tutorial and Level tutorial - General advises.
- Adding custom armor tutorial - How to add your own armor.
- The .lvl files from DAO the Single player and core resource source files project, if you wish to modify the layouts in the level editor.
