Sound
Sounds are created and packaged using the FMOD tool. This is a third-party tool that is included with the Dragon Age toolset. See the FMOD page for documentation on how to use it to create sound resources for use in the designer toolkit.
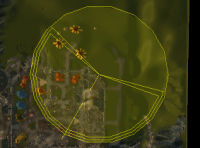
The designer toolset is our way to get sounds into the game. In this application we can define the sound design for any particular area in the game. We have the ability to draw audio volumes to define certain areas, assign sounds to them and even modify and mix within the volume itself, in real time. We can drop emitters for our 3D sounds and modify them as well.
Voice over is handled separately by the toolset; see the relevant section of conversation for more details.
Contents
Sounds in the area editor
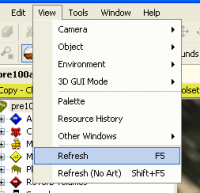
Any sound that you create events for and build to the .fev/.fsb files is available for use in the area editor. The area editor will see these sounds and make them available when the editor is opened or when the Refresh F5 option is selected from the menu. This way you can keep the editor open, go back to FMOD, edit, rebuild and then see your changes in the area editor.
Where are they and how to get them
Sounds in the area editor are available in two places:
Sounds available to be used as 3D placeable emitters and 3D area effects can be accessed from the palette window under Sounds, located by the double eighth note icon.

Although all sounds in the FMOD project will be available here, we will only select the sounds used as emitters from this window. Sounds that we will assign to volumes will be accessed in another way.
All of these sounds will be visible as they are in the event groups we have created in FMOD.
Sounds that we will assign to audio volumes are available in the object inspector window. When you click on an audio volume, the object inspector for that audio volume will come up allowing you to select sounds and assign them to the volume.
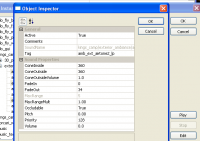
In the object inspector we can name the audio volume, select a reverb for the volume and assign sounds to the volume. For example
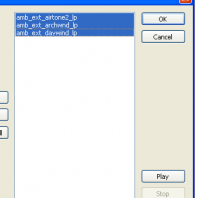
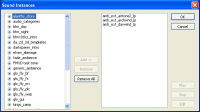
To assign sounds to the volume, click on the ![]() button on the far right of the Sounds field. You will see a window called Sound Instances pop-up that will allow you to access sounds and assign them to the volume.
button on the far right of the Sounds field. You will see a window called Sound Instances pop-up that will allow you to access sounds and assign them to the volume.
Selecting the sound(s) you want to assign to the volume and clicking the Add -> button will transfer the sounds over to the next window.
Likewise, the Remove or Remove all buttons will do just that, remove selected sounds or clear all sounds from the window.
When the sounds are in the window, you can audition them singly or all together and even edit their mix and other properties.
Once selected and assigned to a volume, these sounds will now play in game in the area defined by the volume, based on their individual playback parameters.
The object inspector
The object inspector is a facility offered by the DA designer toolset with which to perform several processes to the sounds we have applied to any given level. We have the ability to modify the audio events that we have created as well as modify other parameters such as the active/inactive status of an emitter, adjust the position of an object, change the 3D cone of an emitter, as well as adjust the max range of the radius of an emitter. These modifiers are also supported by the ability to adjust the occludability, pitch, priority and volume of any given object. These functions will be explained in two ways: 1. how the object inspector allows modification to an audio volume and: 2. how the object inspector allows modification to an emitter.
Use and utility
The object inspector and audio volumes
When you select an audio volume in the area editor, the object inspector shows several fields that will allow us to perform several actions directly related to that audio volume. These fields are:
1. Name - here we can name the volume, usually calling it what it is on the map or some name that describes its function is a good way to name these objects. For example: 'Hallway 1, or Tower Courtyard Lower 1'. Note that there are numbers at the end of the name, you may have volumes that are the same name but are used multiple times, e.g. Alcove 1, 2, 3, 4… and so on, etc. Using a number after each volume, even if it is the only one on the map is an easy way to keep track of what and where things are.
2. Reverb Preset - in this field we can assign a reverb to the volume. Any reverb preset that is in the master_reverb FMOD project is available to use in your volumes.
3. Sounds - sounds can be assigned to audio volumes in this field. When you click to the right of the sounds field a menu called Sound Instances will open and you will be able to select sound events from the FMOD project for the level you are working on and assign them to the volume.
4. Position - this field describes the position of the volume on the map, with values representing points in 3D space including height, which is the last value.
All of the numerical values relating to position are copy/pasteable from one object inspector to the other, which is useful when copying a volume from one map to another, for reuse.
5. Sound Instances - this window allows us to select and assign sound events to audio volumes, in addition, we can also perform some editing functions per sound event. When selecting a sound in the Sound Instances window the editing functions open up, as below:
These functions enable greater control over each sound event assigned to the volume and we can effectively mix these sounds within each volume, as well as script instances within a volume.
The object inspector and emitters
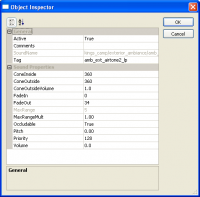
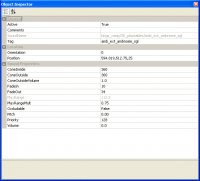
When you select an emitter in the area editor, the object inspector shows several fields that will allow us to perform several actions directly related to that emitter. These fields are identical to the Sound Instances object inspector functions discussed in the previous entry.
Within this window we have the ability to modify other parameters such as the active/inactive status of an emitter, adjust the position of the emitter, change the 3D cone of the emitter, as well as adjust the max range of the radius of an emitter, volume, pitch and priority. All of these values can be copied and pasted as well as manipulated instance to instance.
Volumes and emitters
We can use volumes for two purposes when designing the sound for an area in DA. The first is to use an audio volume to define an area in which you want to play certain sounds as 4.0 ambiences. For example: the borders of a town, or the path of a river, a room in a castle or an outdoor area. All of these instances can use volumes to define the ambient audio we will here when we are in that space in the game. Audio volumes are used in conjunction with emitters to fulfil the 4.0 and 3D directional aspects of all sounds used as ambiences in the game.
Audio volumes
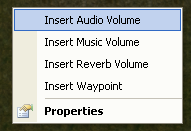
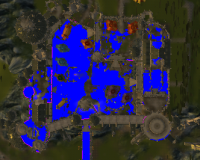
Audio volumes are used to define an area for 4.0 ambiences to be assigned to. In the area editor, simply right clicking anywhere in the map will allow you to begin to draw an audio volume, as shown below..
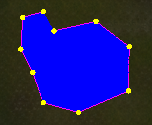
You will then see a crosshairs with which you can point and click to draw virtually any complex shape necessary to define the area you need. You draw these shapes by dropping vertices which then can be moved as a group or independently, in 3 dimensions.
As stated we use these volumes and the shapes we draw to define the 4.0 audio for any given area. These volumes show up in the menu on the right hand side of the area editor. It is here that you can select them to edit their properties and parameters in the object inspector.
Reverb volumes
Reverb volumes share many of the same properties as audio volumes except they are designed to define an area for a certain reverb. Since we can assign reverbs to audio volumes, the reverb volumes are usually used to draw small volumes to place emitters in order for them to be in a separate reverb from the rest of the area. We can currently have 3 reverbs per area.
These volumes show up in the menu on the right hand side of the area editor. It is here that you can select them to edit their properties and parameters in the object inspector.
Emitter properties and utility.
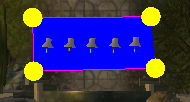
Emitters are used in the area editor to perform several functions, they can be placed to provide the sound for a 3D placeable object, like a fire, flag or waterfall:
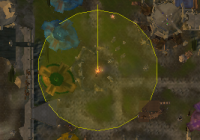
They can be used to define a 3D area effect over an entire area of the map:
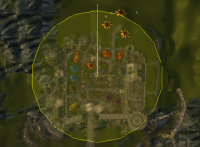
And finally, they can be used as point source 3D ambience over a selected area of the map.
To place an emitter, the sounds can be accessed in the Sounds palette window to the right of the area editor.

Upon selection of a sound, you will be given a crosshair and you can drop the sound anywhere on the map. You can then adjust its position in 3 dimensions as you see fit.
Sounds used as emitters show up in the menu on the right hand side of the area editor. It is here that you can select them to edit their properties and parameters in the object inspector.
